Replace Bathroom Mirror with Medicine Cabinet
This is the very first upgrade we made to our mobile home, so simple yet it makes a huge impact! The original bathroom mirror included in our home’s Value trim package was as no-frills as it gets. There was no place to put toothbrushes, toothpaste, medicine, and the rest of the items we all like to have within quick reach in the bathroom.
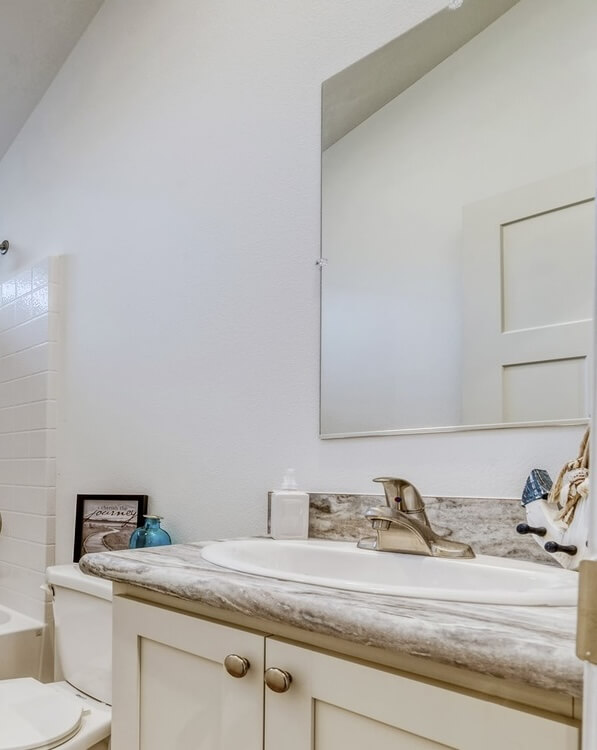
before

after
How to Remove a Bathroom Wall Mirror Safely
I followed these steps from a Lowes How-To guide. It worked well, I got the mirror down in one piece without much effort and thankfully the mirror didn’t break.
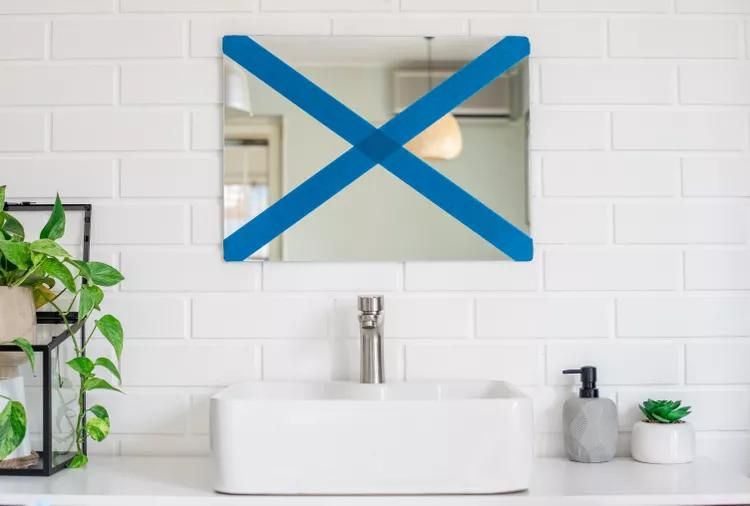
Step 1 Tape the Mirror
Cover the mirror with heavy-duty packing tape as a precaution against the glass cracking or shattering.
Step 2 Insert Wooden Shims
Insert wooden shims in any gaps between the mirror and the wall. Tap them snug, but avoid forcing them beneath the glass.
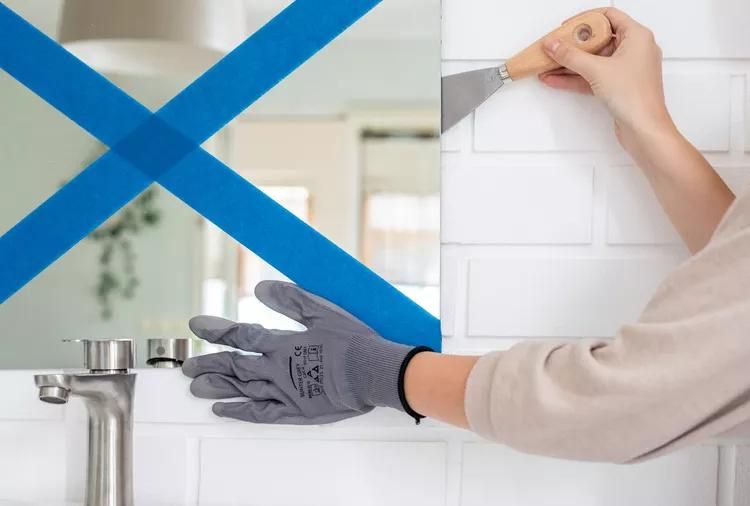
Step 3 Gently Begin Prying
With another shim beneath your pry bar/putty knife to protect the wall, gently begin working the bar behind the glass. Maintain a steady pressure and listen for the drywall paper tearing loose from the wall. Gently work along the top and sides of the mirror, releasing a little bit at a time.
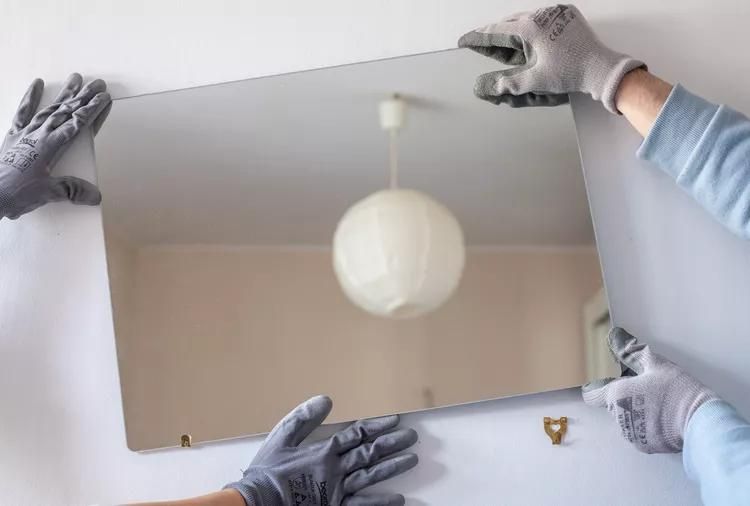
Step 4 Support the Mirror
As you near the bottom of the mirror, support it at the top to prevent the whole thing from popping free of the wall and falling.


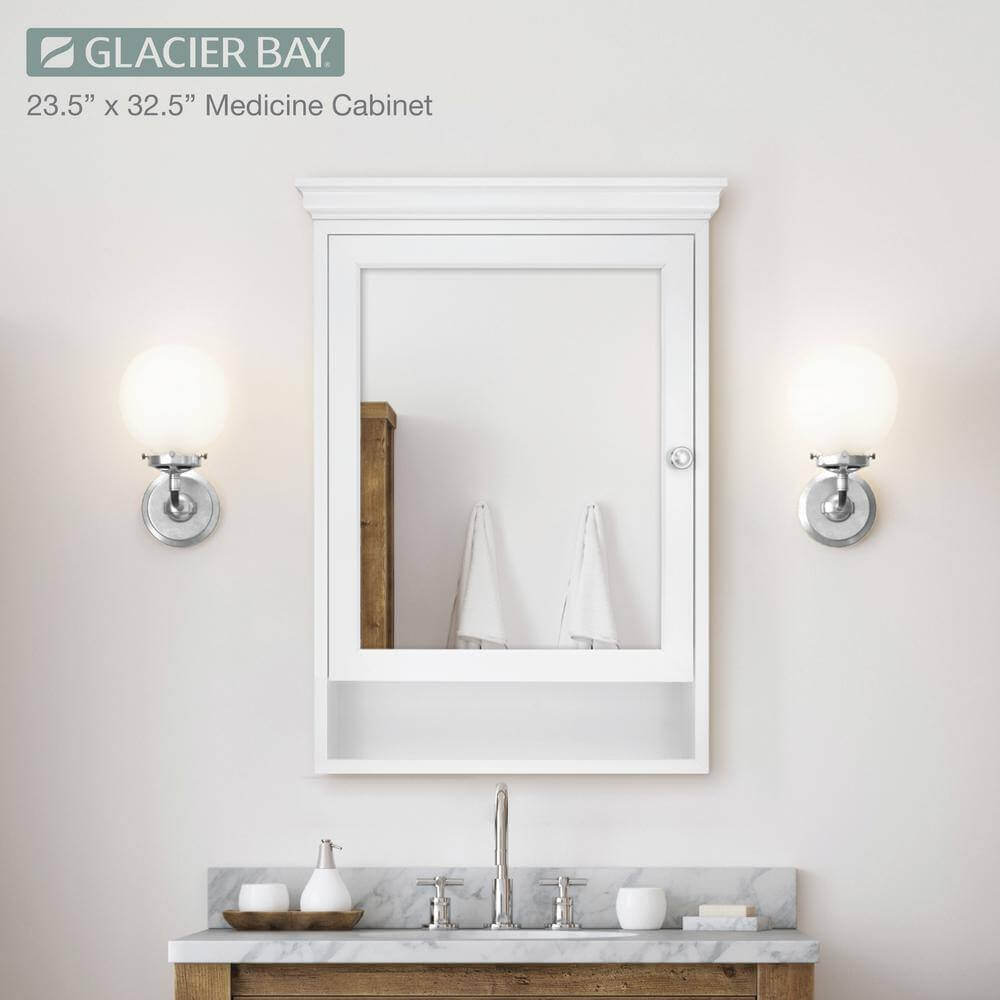
Glacier Bay Surface-Mount Bathroom Medicine Cabinet
We love the style, simple install, and STORAGE!
- Modern shaker style profile is an elegant add on to any bathroom
- 2 adjustable interior shelves for flexible storage options
- Wood composite construction provides extra durability
How to Install a Wall Mount Medicine Cabinet
I didn’t get any pictures as I was doing this solo, but I’ve written the steps I followed from the Manufacturer’s Installation instructions.
Step 1 Determine the Mounting Location
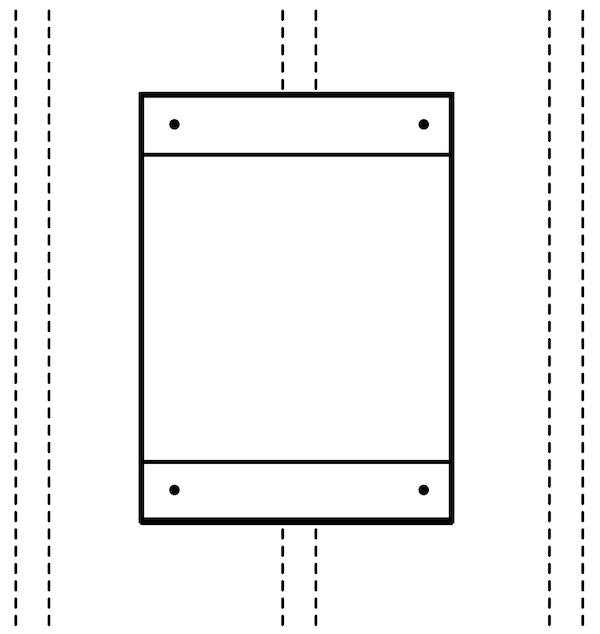
For this I made a template from the box it came in the same size of the cabinet – I measured it at 20.75″ W x 29.25″ H. Then I put it on the wall eyeballing where I wanted it and then checked it for level before taping my template to the wall. Once I was happy with the placement I traced the template lightly with a pencil to help with positioning with the actual cabinet. Remove the taped template.
Step 2 Prepare the Cabinet
Drill 1/8 in. diameter holes through the back panel of the cabinet on all four corners. Be careful not to drill through your vanity top or whatever the cabinet is laying on as you drill it.
Step 3 Installing the Cabinet
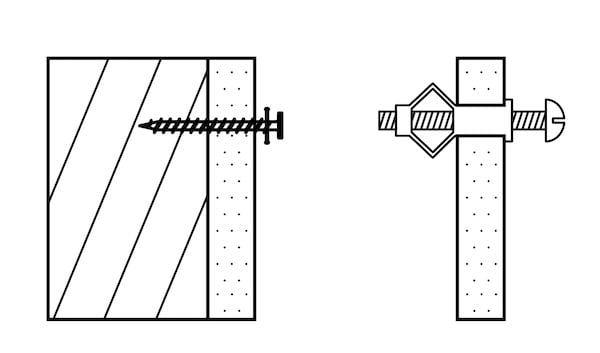
If you’re lucky enough that all four corners of your template overlapped a wall stud, then go buy a lottery ticket immediately! If you hit at least one stud, then it’ll only need a wood screw. If it doesn’t hit a stud, you’ll need to use a Drywall Anchor that is weight-rated high enough for the cabinet. Use a Stud Finder to determine if you have studs or empty wall behind the corners.
Have a TALL second person hold the medicine cabinet on the wall while you take a pencil and mark the holes you previously drilled into the cabinet’s four corners. This is best done while atop a sturdy step stool.
- For wall stud installation, insert #12 x 3 in. screws (not included) with washers sized large enough to snugly fit the screw (not included), then insert the screw/washer combo through your pre-drilled cabinet holes and into the studs while your helper is still holding the cabinet against the wall within your pencil alignment marks.
- For drywall installation, drill larger holes at your pencil marks according to the size required by your toggle bolt anchors (not included) and insert them with washers through the pre-drilled cabinet holes and into the drywall. With the phillips head screwdriver, tighten until you feel strong resistance.
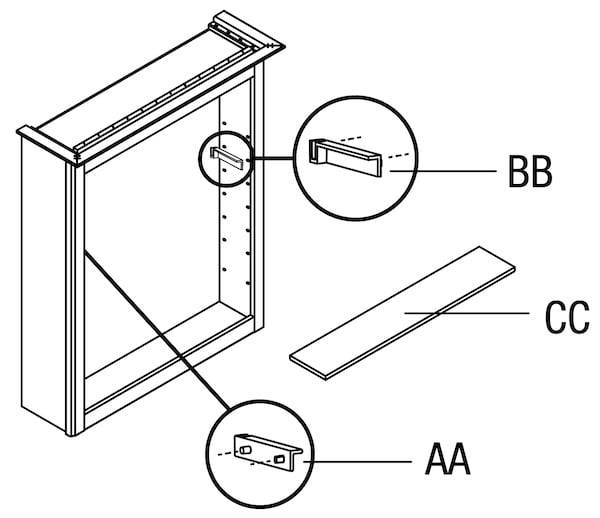
Step 4 Install the Shelves
- Insert the left shelf clips (AA) into the holes on the left side of the cabinet. Repeat on the right side (BB).
- Rest the shelves (CC) on the shelf clips.
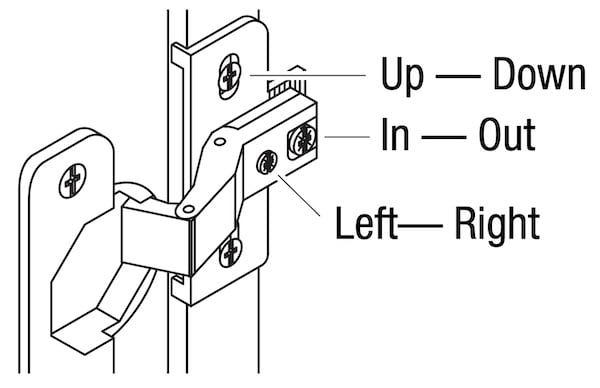
Step 5 Install & Adjust the Doors
Chances are the doors won’t be perfectly aligned on each side, you’ll need to adjust their positioning left – right or top – bottom.
To Adjust the Doors: Hold the door while loosening screws according to the graphic. Align the door(s) properly, and re-tighten the screws.
Tools you’ll need


More interior remodeling posts


Behind the TUTORIALS
Hi, I’m Sarah
I’m a passionate DIY’er and Remodeling enthusiast. I’m the creator of Cheap to Chic Mobile Home and I’m committed to sharing my knowledge of renovation and building skills with you.
After volunteering as a builder with Habitat for Humanity for 10+ years and building my own 1200 sq ft Garage and 480 sq ft Tiny House from scratch, we have downsized our life into a 784 sq ft Single Wide Manufactured Home in a Mobile Home Park.
Join me as I learn, share my experience, and hopefully encourage/inspire you along the way!
