How to Prep & Paint an Accent Wall
FINALLY… there’s an end in sight to the sterile ALL WHITE walls in our house!! We were both soooooo excited to start with the Livingroom accent wall behind the couch. Accent walls are a good intro to painting walls and the necessary prep, without full on committing to your whole house. They look best if they follow the 60-30-10 wall color rule to maintain the room’s color balance. Simply put, 60% of your room will have the dominant color, 30% should primarily be the secondary color, and 10% the accent color. Currently, ours is 100% WHITE!
We expected that painting the 10′ x 14′ Accent wall would take half a day – including prepping the wall with painter’s tape, plastic sheeting, drop cloth and preparing your tools for the job. Actual time it took us: 3 hours for prep, paint, cleanup
Choosing our Accent Wall Paint
From my experience building with Habitat for Humanity and being told ad nauseam by our painting contractor friend, Sherwin Williams makes the best paint and you get what you pay for! TIP: Save 10% if you’re a member of their FREE Paint Perks program
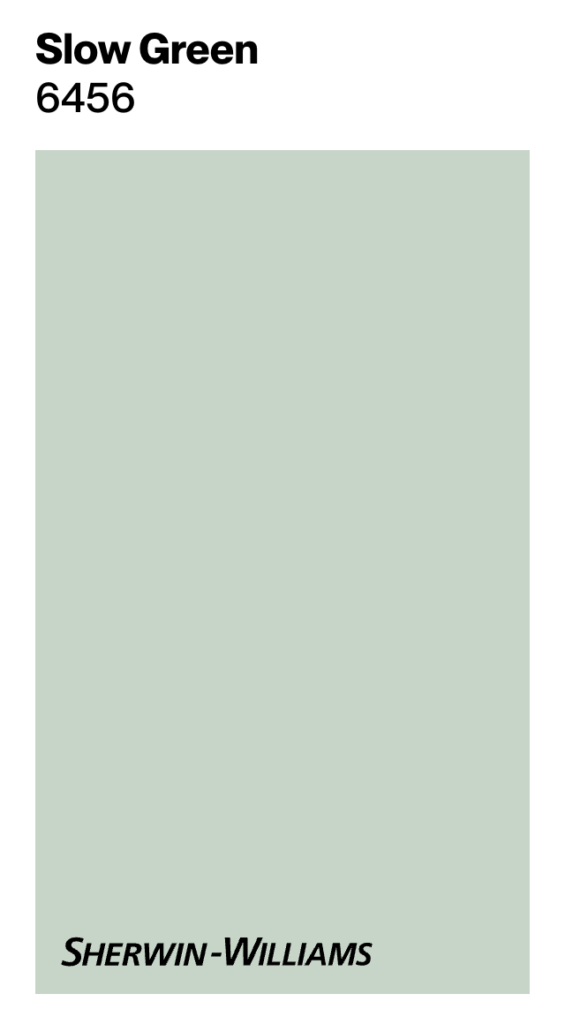
Our chosen color is Sherwin Williams Slow Green SW 6456 – a soft minty green that’s not overwhelming – we like subtle nature hues. Read more on how we narrowed down our paint choices for the accent wall using large 9″x14″ peel-and-stick paint samples instead of making a mess painting sample sections of the wall by hand.
We went in to our local Sherwin Williams paint store and answered questions about our wall: existing color, condition, and how much ‘traffic’ or potential it has for dirt, scuffs and hand prints.
For our wall, we were advised to use Emerald Interior Acrylic Latex Paint – a paint and primer in one, offers exceptional hide, coverage, durability, and washability. Our paint expert suggested the SATIN finish and suggested we’d probably only need one coat. (He was right – we only needed 1 coat!)
Step 1: Prepare Tools and the Wall
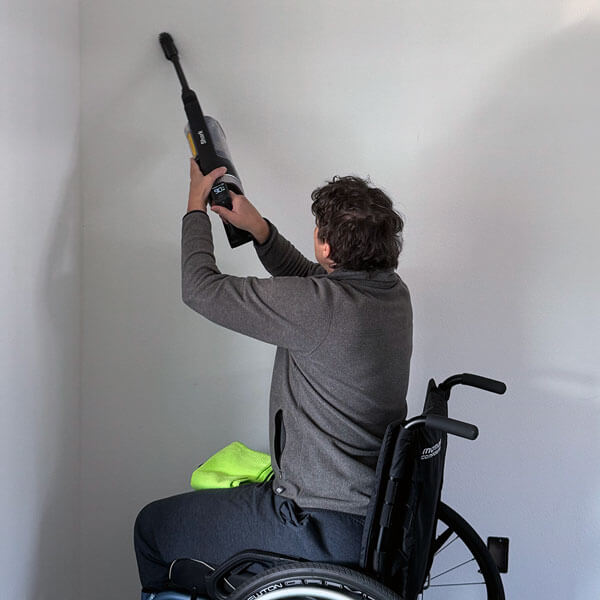
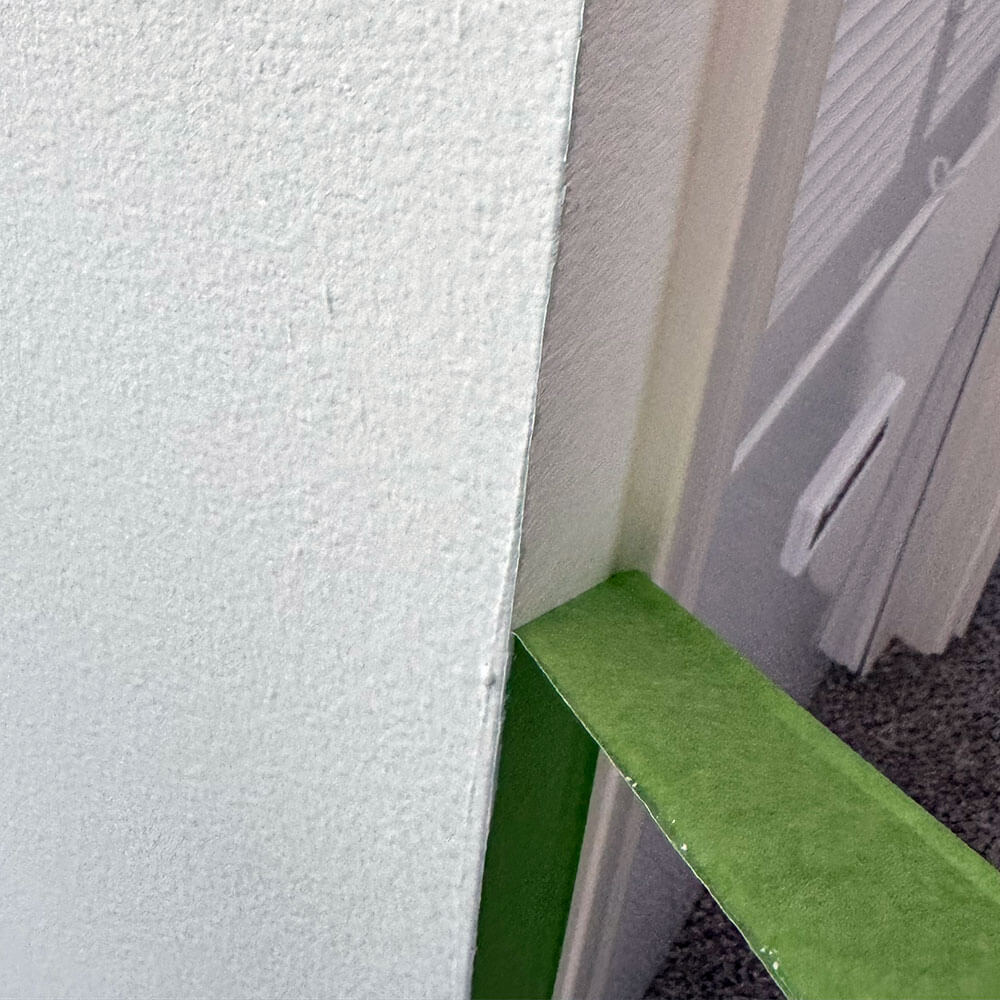
Wall Prep – Use painter’s tape and plastic sheeting to protect the surrounding walls and furniture and a canvas drop cloth to protect your floor. Paint does not come out of carpet easily! Prep the wall surface by filling in any holes with painter’s putty then sand away excess and clean the wall with a damp rag. Unclean walls will transfer debris on to your paint roller which can leave undesirable marks/patterns over the entire painting area as you roll the wall. Remove all outlet covers, switch covers, and anything hanging on the wall to be painted.
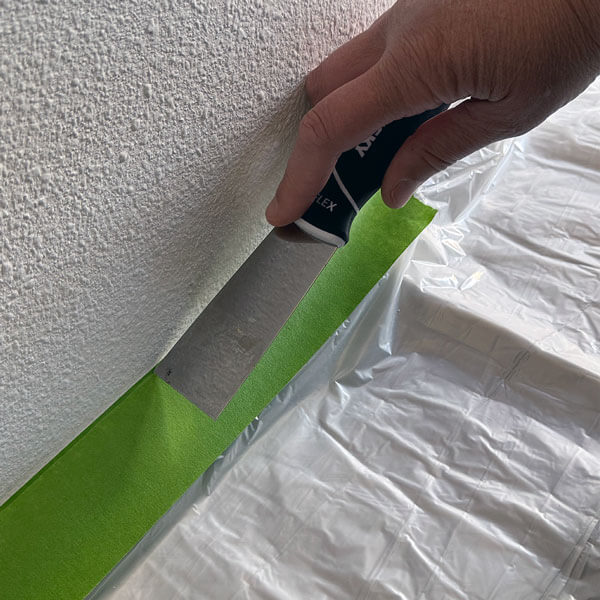
TIP: Use several shorter lengths of painter’s tape instead of one very long section for the edges. When applying the tape, use an arm’s length at a time. Press tape firmly into edge/wall/baseboard/ceiling with a flexible painter’s putty knife. If you see any bubbles, use the putty knife to press them down to help prevent any paint from seeping through.
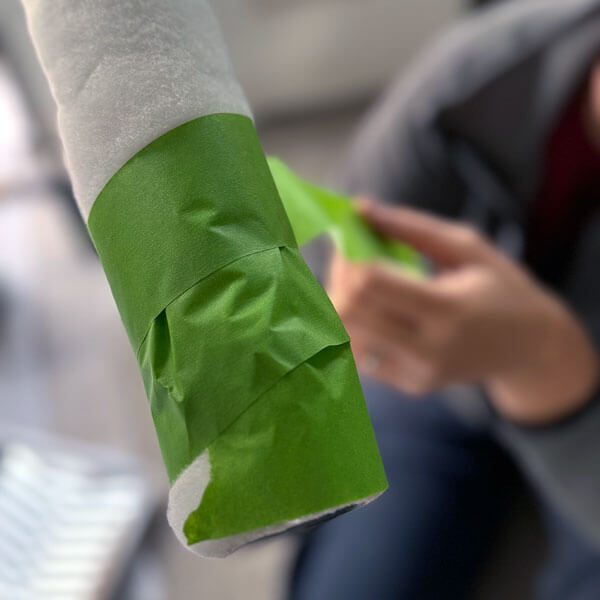
Remove the fuzz or lint from your Paint Roller – The easiest method is to wrap your paint roller with painter’s tape – like you’re taping a bat or racket or sports stick, and press the tape firmly on to the roller. Unwind the tape removing it from the roller with all of the loose fuzz from the roller that would have otherwise ended up on to your walls! You just saved yourself A LOT of frustration!
Mix your Paint – Stir your paint with a long wooden stir stick until the paint is even in color and consistency. Do not shake the paint canister – this will create air bubbles that will look terrible on your wall. Or, take it to the paint counter at the home improvement store for them to give it a few minutes of tumbling in their mixer – recommended for paints that have sat on the shelf for a long while.
At this point, we put our dogs into their crates to keep them out of trouble and hair out of our paint!
Strain the Paint into your Handheld Paint bucket and Roller tray – Pour your paint (after mixing first) through a paint filter cone directly into your handheld paint bucket or roller tray for use. The paint filter will remove any lumps, globs, clumps or inconsistencies in the paint.
Tools & Materials you’ll need
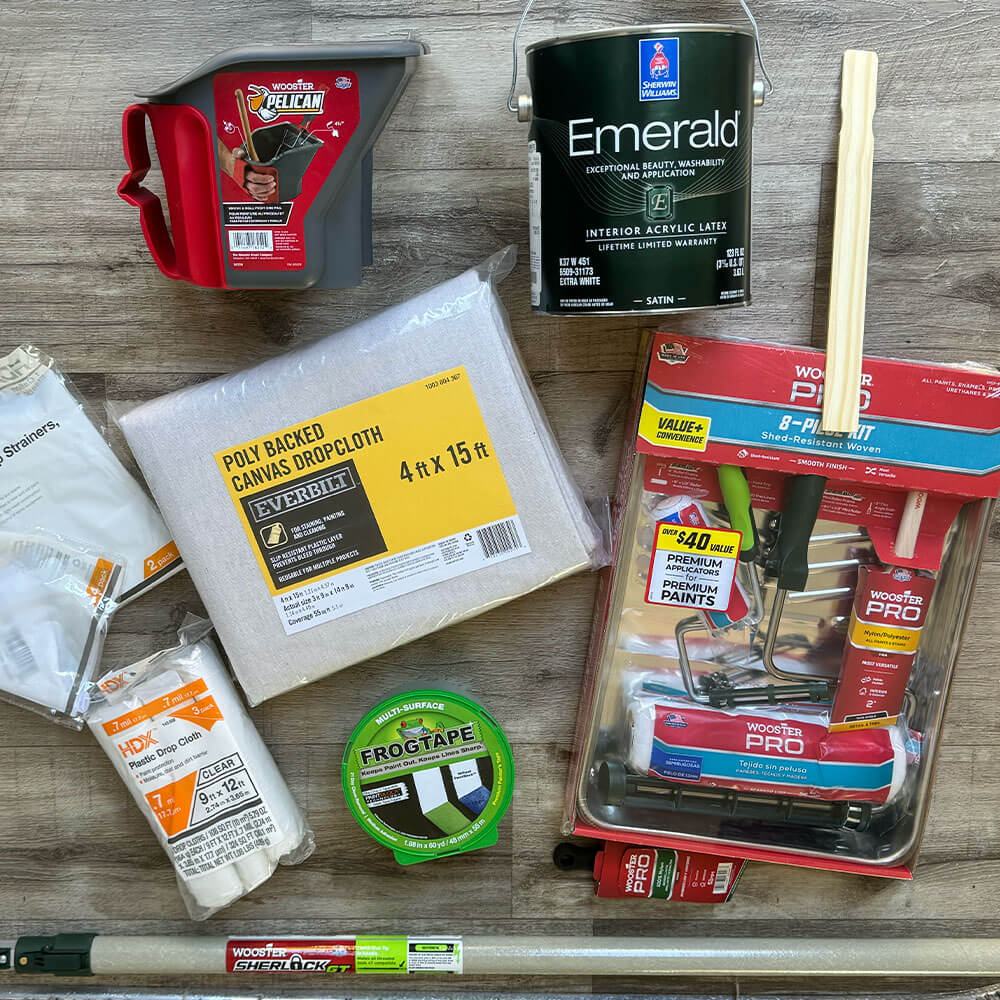
Materials on Amazon
- Interior Acrylic Latex Paint – TBD Brand Color & Finish
- Ladder height depends on your ceiling
- FrogTape – Painter’s Tape with PaintBlock
- Handheld Paint Bucket + Liner – for painting edges
- Roller / Roller Cover / Paint Tray & Liner / Trim Brush Set
- Roller Extension Pole
- Canvas Drop Cloth
- Plastic Drop Cloths
- Paint Stir Stick(s) – free at HomeDepot/Lowes/Ace
- Paint Can Opener
- Flexible Putty Knife
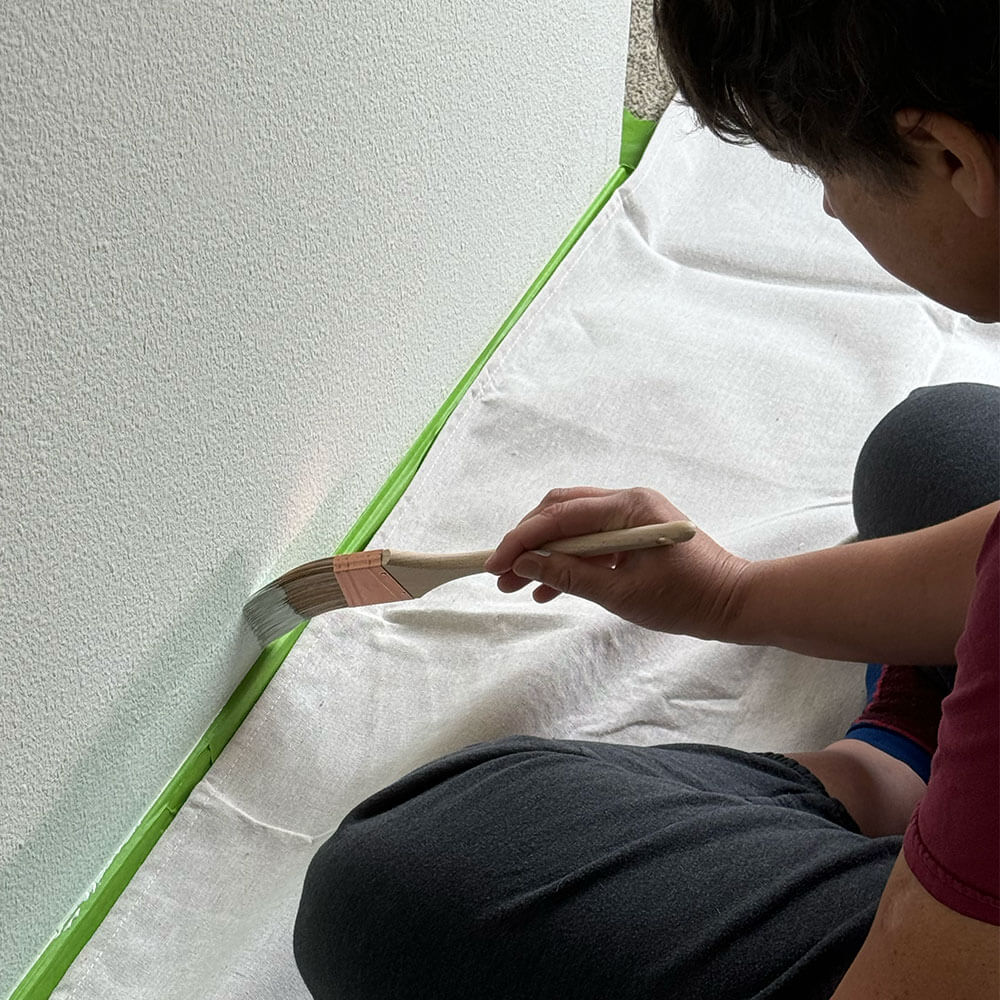
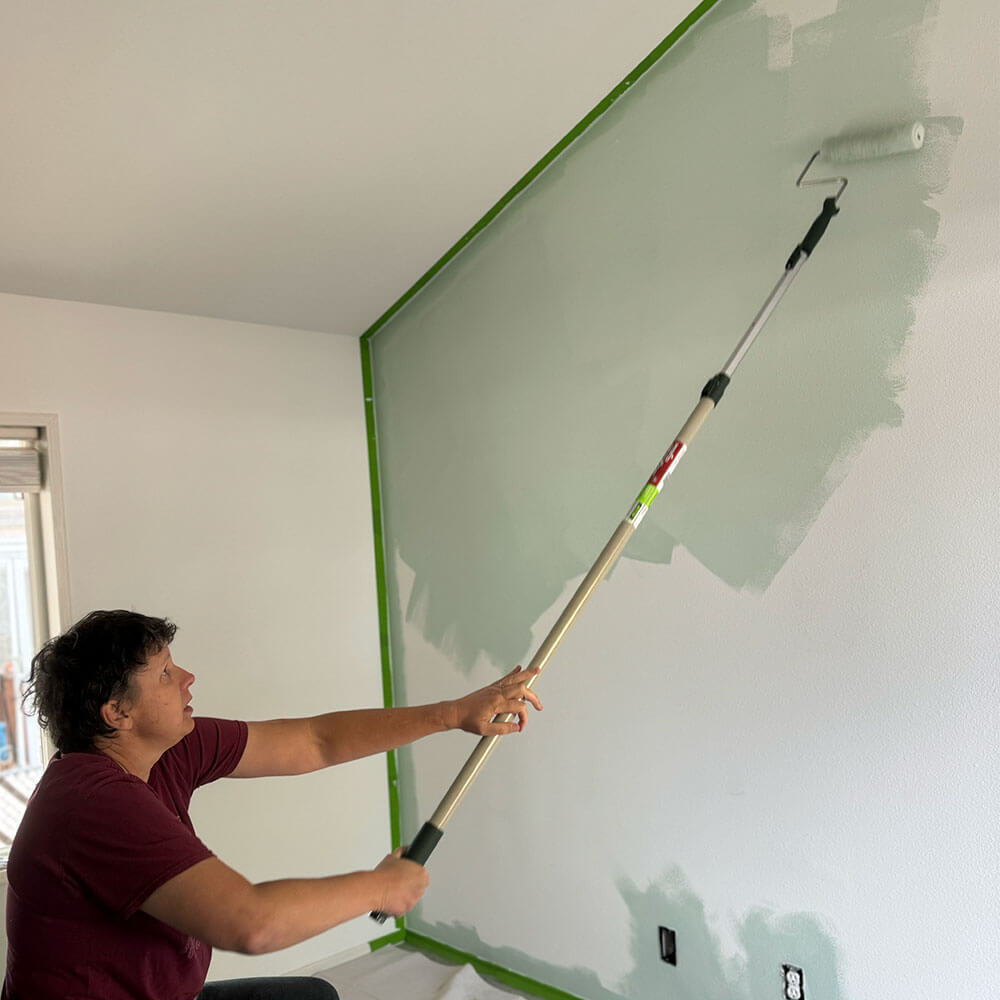
Step 2: Paint the Edges
Use an angled trim brush to paint along the edges where the wall meets the ceiling, baseboards & floor, and other walls. Short trim brushes work best for this. Often they’re included in Paint Roller sets – if purchasing by itself, make sure it’s rated for the type of paint you’re using and roughly 2-2 1/2 inch width.
Paint roughly a 3 inch wide band around all edges. When you roll your wall up and sideways, you’ll overlap but not exceed this 3 inch band. Think of it as coloring inside the lines for Adults.

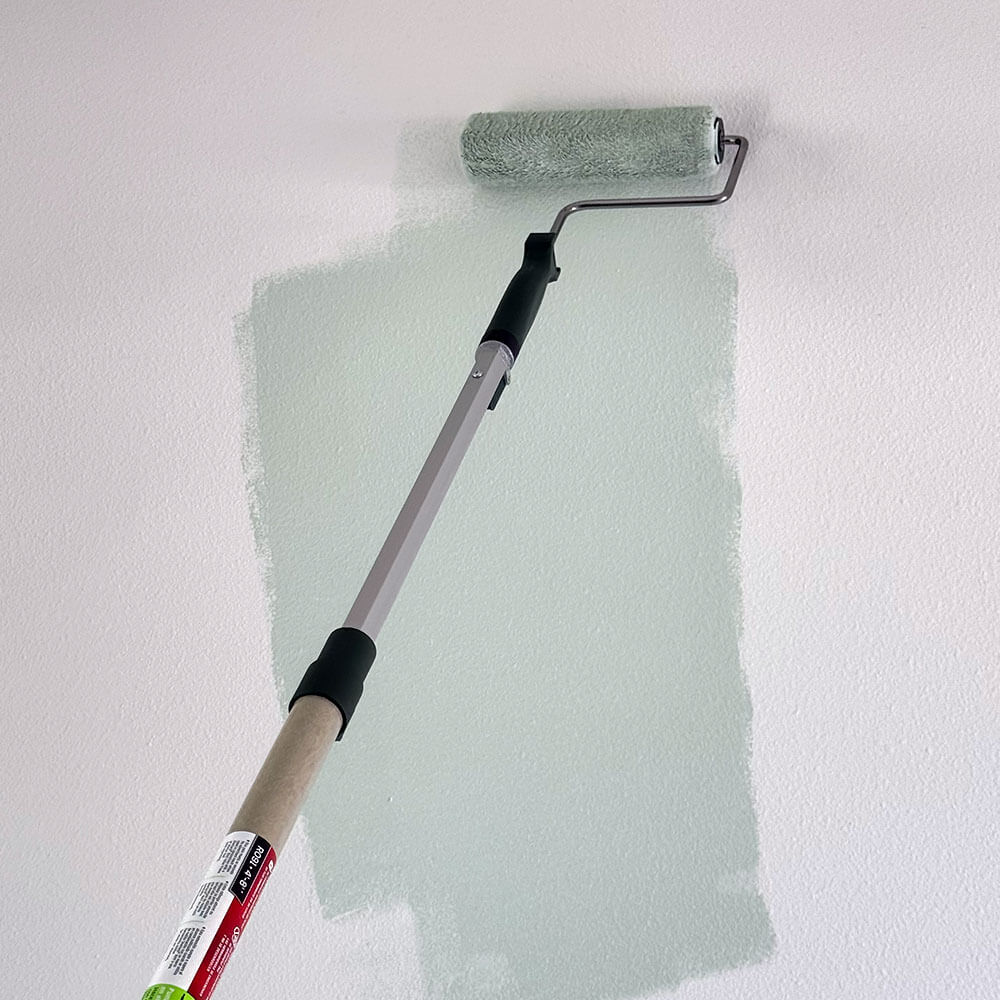
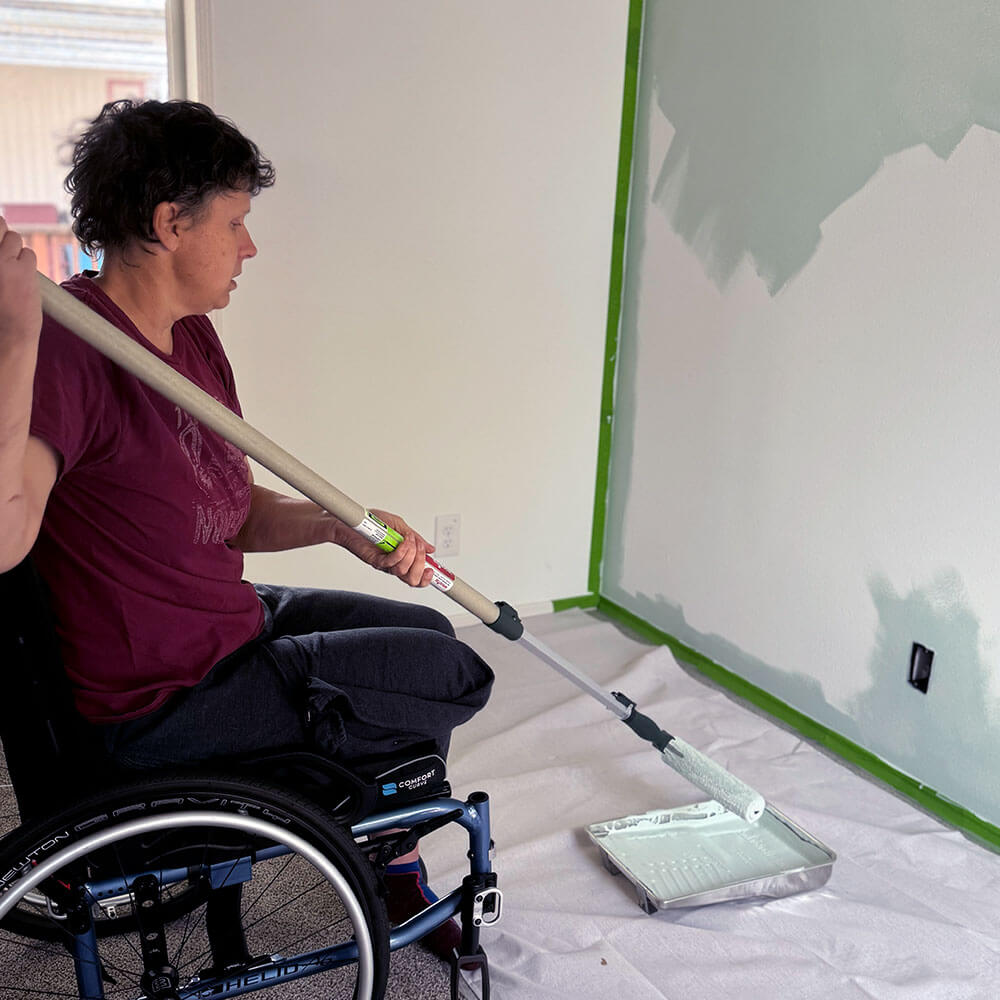
Step 3: Roll out the Wall
Primer – if needed, your paint counter professional will recommend you begin with a primer as your base coat on the wall. Often needed when covering up very dark or very bright colors or when the wall needed substantial drywall repair done. Follow the painting method listed under Paint.
Paint – If using a water-based paint, dampen the roller with a wet paper towel, then pat off excess with a dry paper towel. Wetting the roller helps it absorb paint more evenly, which can lead to a smoother application.
Load the roller cover with paint in the deep end of the roller paint tray. Do this several times to fill the entire surface of the roller cover with paint. A properly loaded roller should not drip when moved and does not require you to apply force against a wall when painting.
Use a roller and extension pole to paint the rest of the wall in long, even strokes. Start at the top of the wall and work your way down in a W motion, overlapping past strokes as you travel across the wall. Depending on the paint and color, you may need more than one coat for full coverage. Allow the paint to dry completely between coats.
Step 4: Remove the Tape
When the paint feels dry to the touch, but before it has dried completely, remove the painter’s tape at a 45-degree angle to create a clean line. If an area is strongly adhering, score that section of the paint above the painter’s tape with a utility knife prior to removing the tape. Take it slow, it’s not a race. The more careful you are in removing the tape, the less touch ups you’ll have to do later.
It took about 45 min – 1 hr for our one coat of paint to be dry to the touch. I don’t have exact as we went and grabbed a late lunch. I then tested if the paint was dry in an inconspicuous spot, just in case it wasn’t and I left a fingerprint.
Step 5: Touch Up & Let it Dry
Touch up – Once the paint is dry to the touch, check for any areas that need touch-ups. Touch up with your trim brush or a mini roller. ‘Feather out’ the touch up spot – go over the spot and push the paint outwards into the surrounding area – feathering the paint out beyond the repaired spot to blend into the wall. If touch up is needed for a cleaner edge, make sure the paint is completely dry before putting painter’s tape on the freshly painted surface – also make sure your painter’s tape is rated for freshly painted walls. Repeat the wall prep from before by pressing the tape down firmly with a putty knife for good adhesion before painting with the trim brush.
Let it Dry – Allow the paint to dry fully, which can take a day or two. Set up oscillating fans to help evacuate the paint fumes out open windows. Careful not to leave windows open on a windy day after painting, you’d hate to have to repaint because of dirt and debris blown on to your freshly painted wall.
Step 6: Clean Up
There’s two schools of thought when it comes to paint brushes and rollers – one that they should be cleaned and kept for the next project & forever after that, or that they are one-time use and then are thrown away at the end of the project. I personally don’t clean and keep my brushes – I don’t want the mess of cleaning out the brushes with mineral spirits and a fine tooth comb, I’d rather buy a new one each knowing it’s ready to go and perfect. I also don’t want to clean a brush full of paint in my kitchen or bathroom sink – NO thank you!
Don’t put furniture back just yet or lean anything close to the wall until it is completely dry or it’ll mark up the surface and require a touch up. Remember pets – we have two dogs that shed who have to be kept away from the wall unless we want dog hair to be forever stuck in the wall paint.
Our Results…
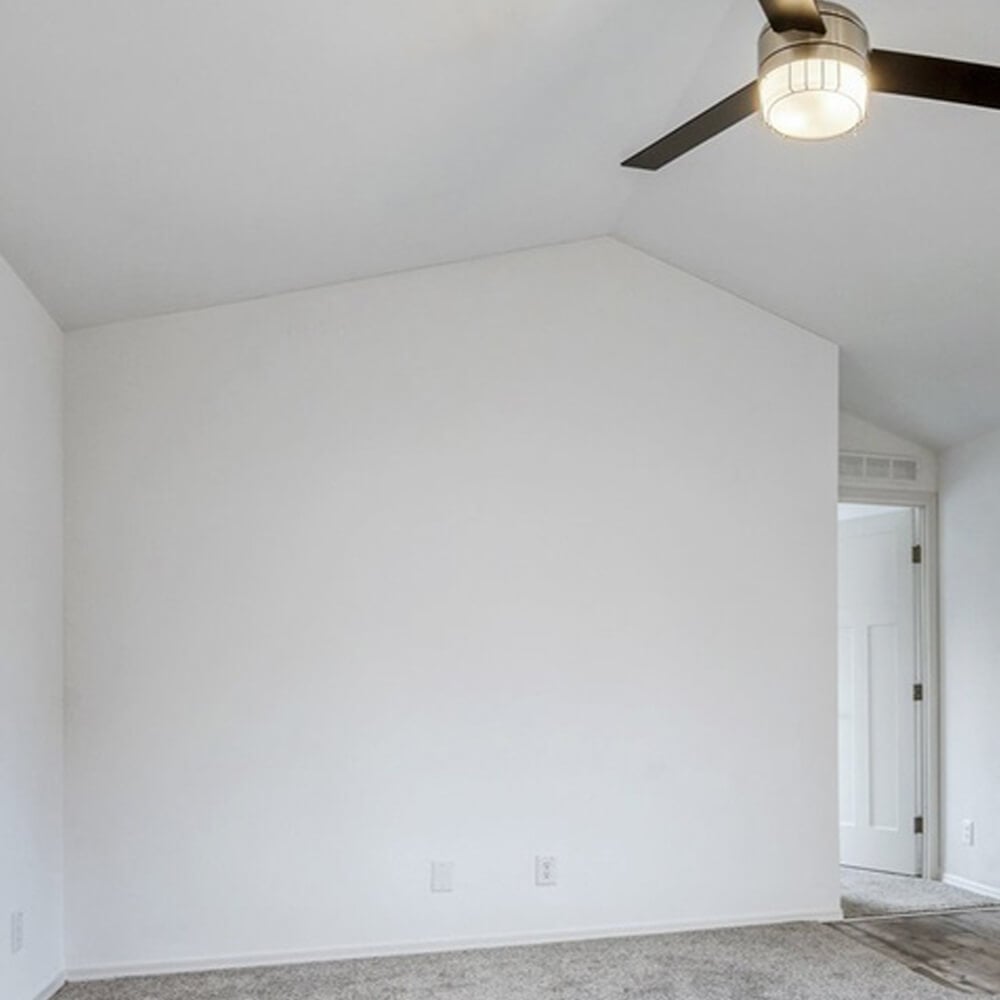
before
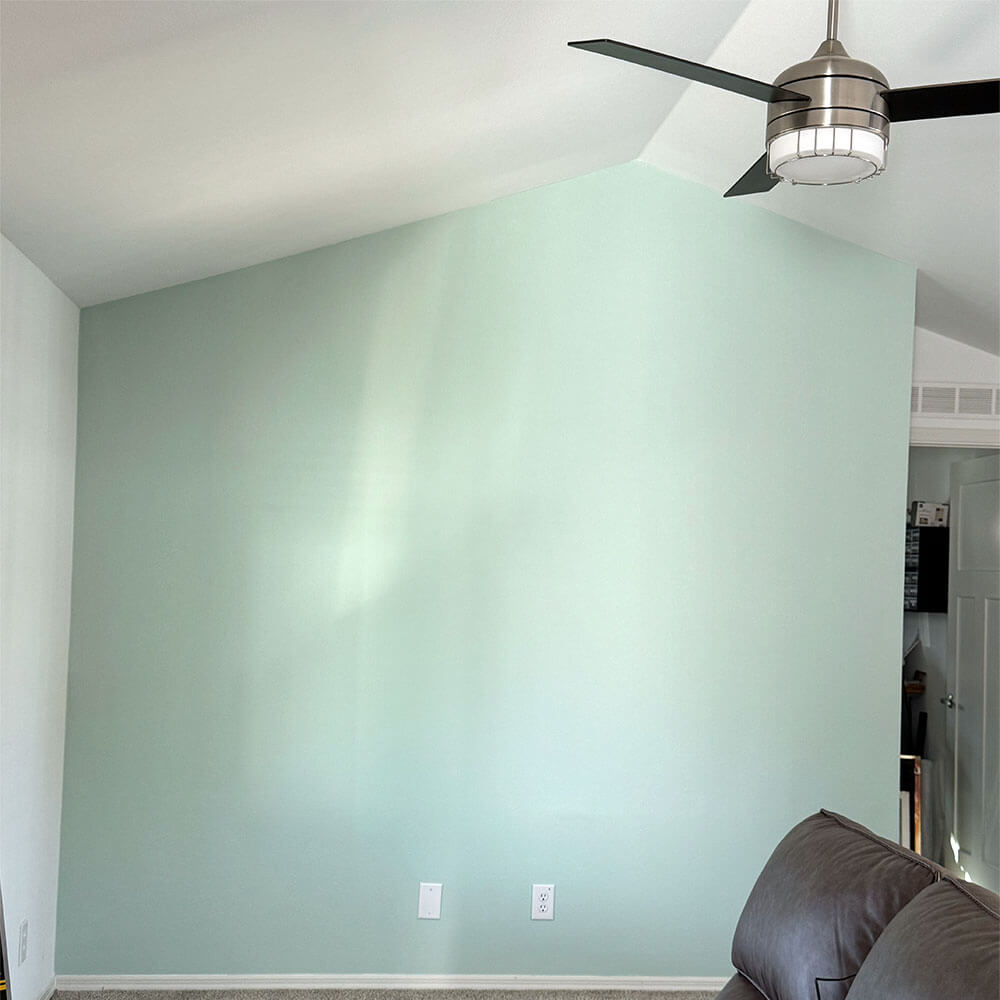
after
Behind the TUTORIALS
Hi, I’m Sarah
I’m a passionate DIY’er and Remodeling enthusiast. I’m the creator of Cheap to Chic Mobile Home and I’m committed to sharing my knowledge of renovation and building skills with you.
After volunteering as a builder with Habitat for Humanity for 10+ years and building my own 1200 sq ft Garage and 480 sq ft Tiny House from scratch, we have downsized our life into a 784 sq ft Single Wide Manufactured Home in a Mobile Home Park.
Join me as I learn, share my experience, and hopefully encourage/inspire you along the way!
